Connect Vonage (Nexmo)
You can connect Vonage to WordPress with an API Key, API Secret, and allowed sender. Add them to Texty, turn on the gateway, and send a test SMS to check the link.
Is Vonage the same as Nexmo?
Section titled “Is Vonage the same as Nexmo?”Yes. Nexmo became Vonage APIs, but some screens and web addresses still use the Nexmo name. Texty may also show the gateway as Vonage (Nexmo).
You will need:
- Texty set up and active.
- A Vonage API account.
- Your Vonage API Key and API Secret.
- A sender that Vonage allows for the country you plan to text.
- A phone that can receive your test SMS.
If you still need to choose a provider, read how to connect your first SMS gateway.
Keep your API Secret private: Do not place it in screenshots or share it with support.
Where do you find your Vonage API Key and Secret?
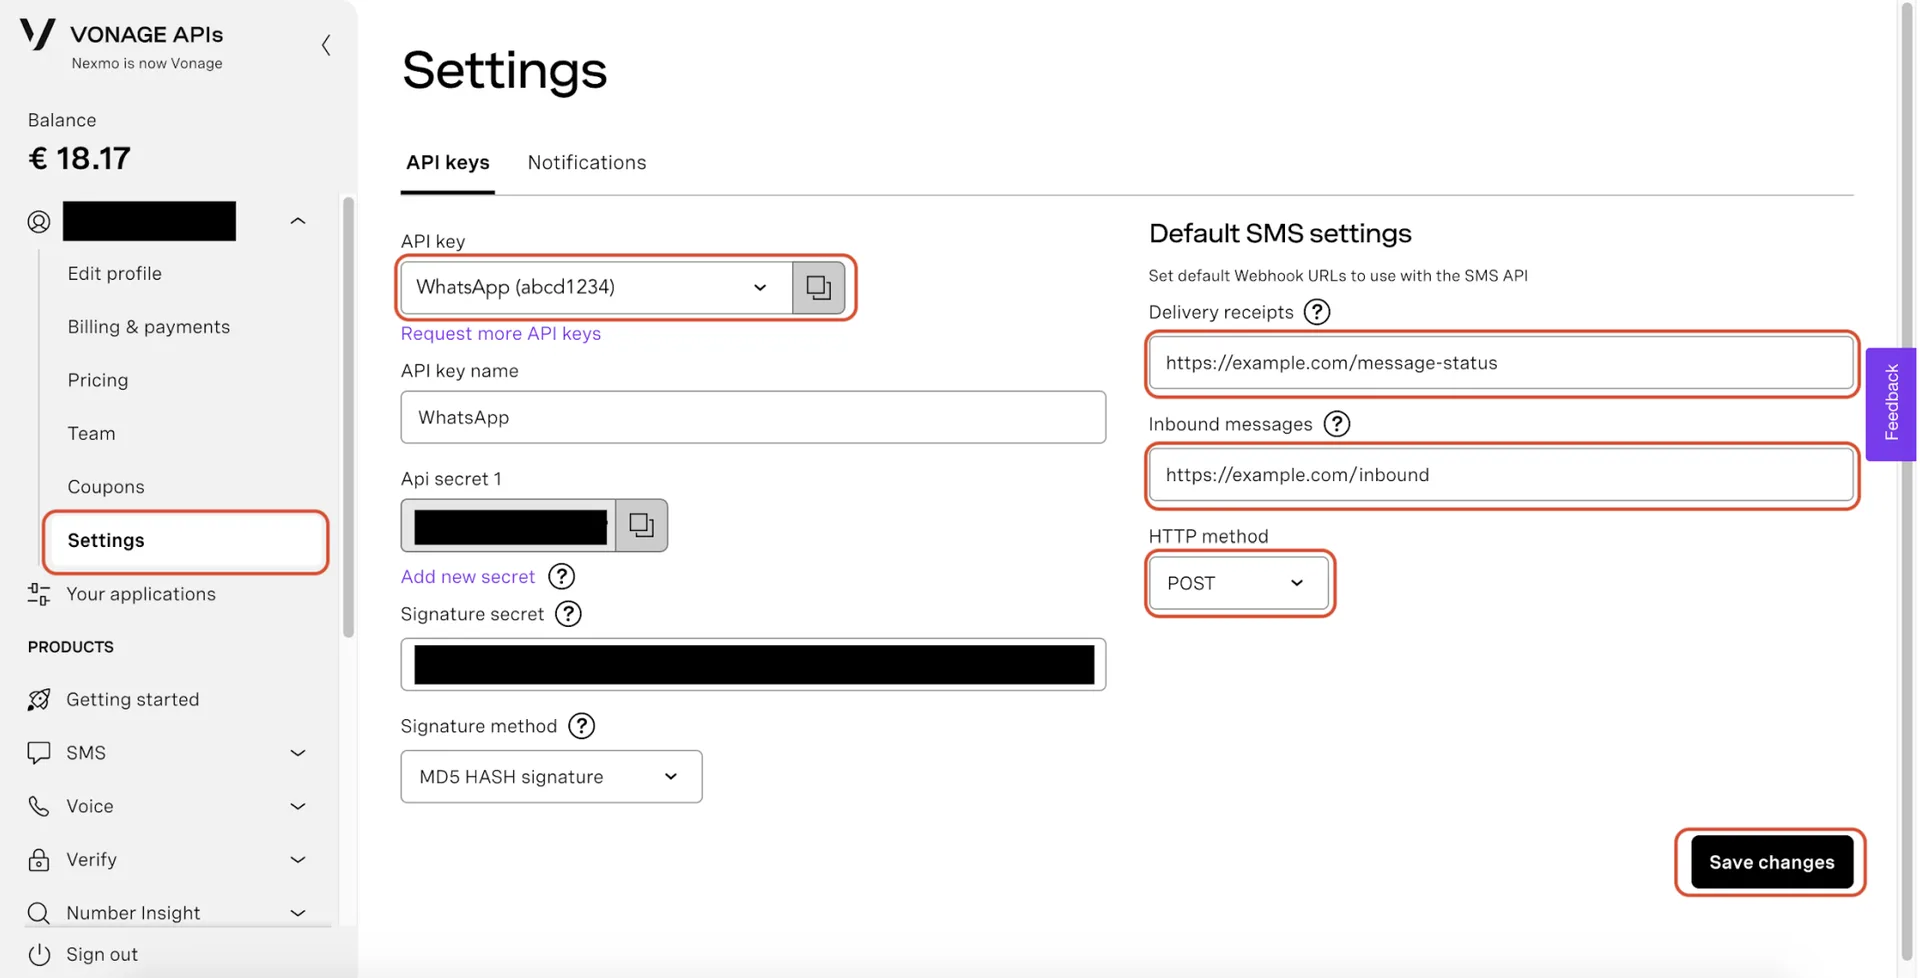
Section titled “Where do you find your Vonage API Key and Secret?”Sign in to the Vonage API Dashboard. Open the dashboard home or getting started page.
Copy your API Key. Reveal your API Secret, then copy it. Choose the number or sender ID you plan to use.
What should you use as the Vonage sender?
Section titled “What should you use as the Vonage sender?”Vonage can send from a number or a brand name. Your choice depends on the country you text.
- For a number, use its full international format.
- For a name, use a sender ID that Vonage allows.
- For US texts, use the sender type and account checks that apply to you.
If you are unsure, check the sender rules in your Vonage account before going live.
How do you connect Vonage to Texty?
Section titled “How do you connect Vonage to Texty?”Log in to your WordPress admin.
Go to Texty > Gateway. Open the gateway configuration and select Vonage. Paste your value into API Key& API Secret.
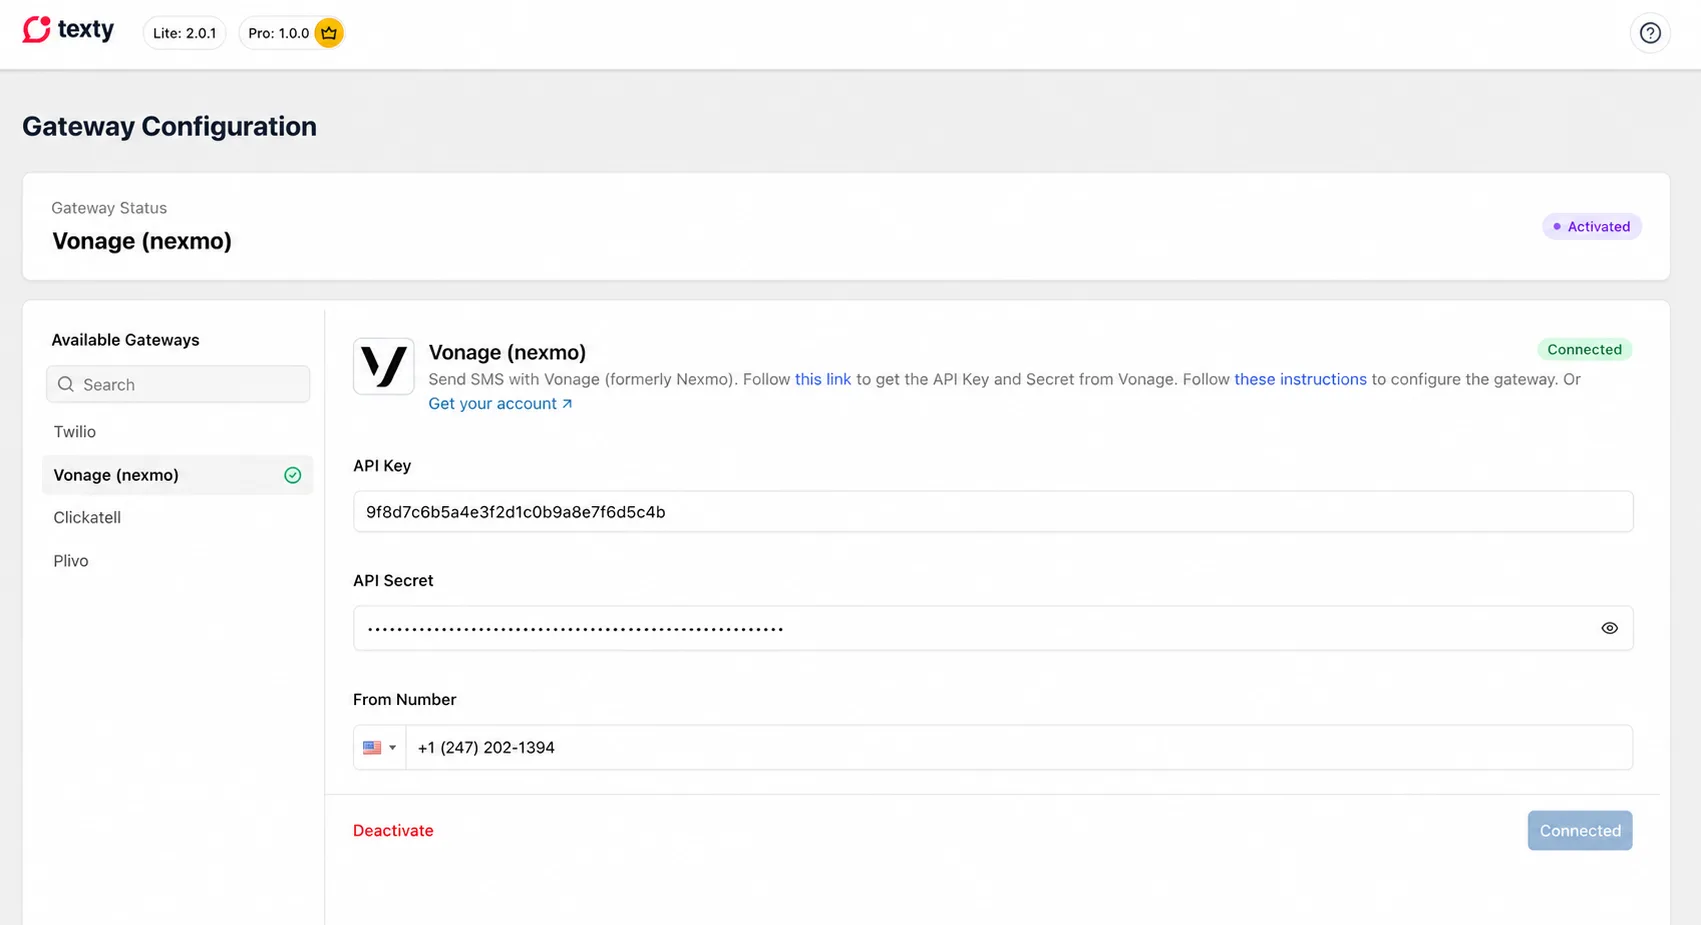
Enter your number or approved name in From Number. Click Connect. When the connection succeeds, click Activate.
Expected result: Vonage now shows as active. Texty will use it for each new SMS.
How do you test the Vonage connection?
Section titled “How do you test the Vonage connection?”To test if the Vonage is proper connected, you need to open the Dashboard tab in Texty and find the Quick Send SMS feature. Enter a phone number with its country code.
Next, click Send Test. Check the phone for the test message. Open Texty > SMS Logs and review the new record.
A good send means Vonage took the message. It does not prove that the phone got it. If no SMS arrives, check the Texty log and your Vonage message log.
For more detail, follow how to send a test SMS.
Why is Vonage not connecting or sending?
Section titled “Why is Vonage not connecting or sending?”| Problem | What to check |
|---|---|
| Texty rejects the connection | Copy the API Key and API Secret again. Remove extra spaces. |
| Vonage reports invalid credentials | Make sure the key and secret come from the same Vonage account. |
| The sender is rejected | Use a number or sender ID that Vonage allows for that country. |
| A demo send fails | Add the receiving number to the approved test list in your Vonage account. |
| Vonage reports low credit | Add funds to the account, then test again. |
| Vonage accepts the SMS, but it does not arrive | Check the Vonage report, number format, route, and destination rules. |
If Texty shows a Vonage error, keep the error number and message. They can help you find the exact cause. Never include your API Secret when asking for help.
What should you do next?
Section titled “What should you do next?”After the test arrives, turn on one Texty alert and trigger the right event. Then check the message in SMS Logs.
To change providers later, follow how to switch or disconnect an SMS gateway.